New features in version 4 include customization of the displayed content and the ability to save the timer configuration in the active presentation as well as on the computer.
Version 3.5 supports PowerPoint 2010 including the 64 bit version.
![]() 2010
2010
![]() 2007
2007
![]() 2003
2003
This add-in works with PowerPoint 2000 or later.
The add-in provides 3 different types of time displays, though only one is active at any given time. During a slideshow, it can:
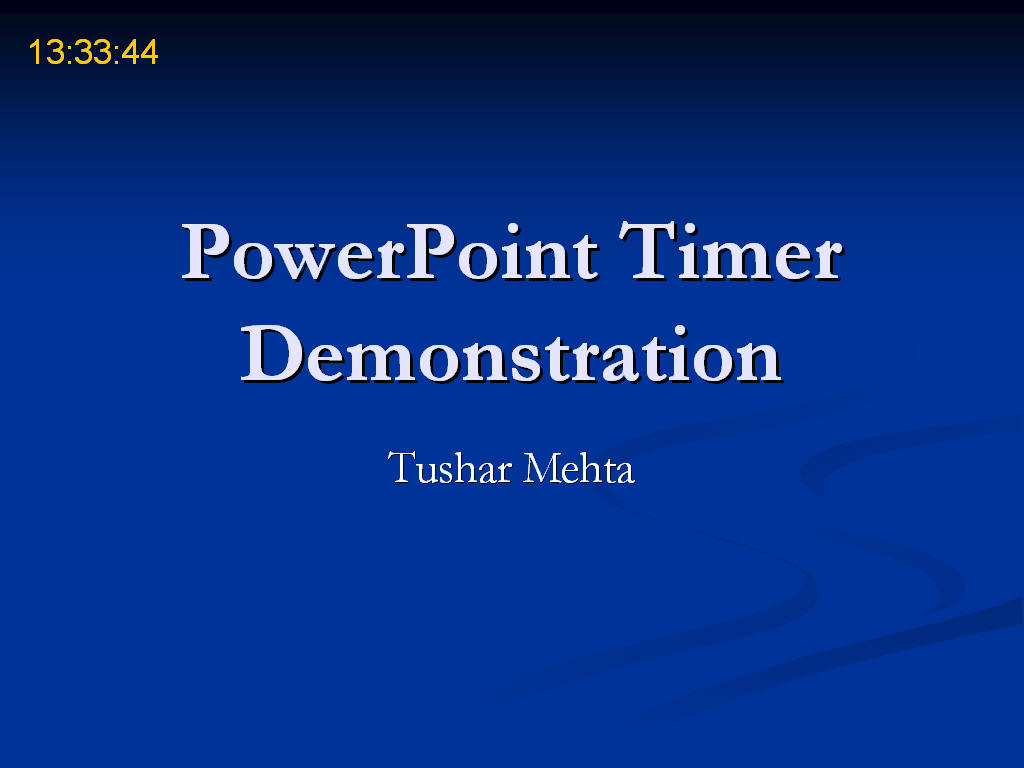
1) show the current time
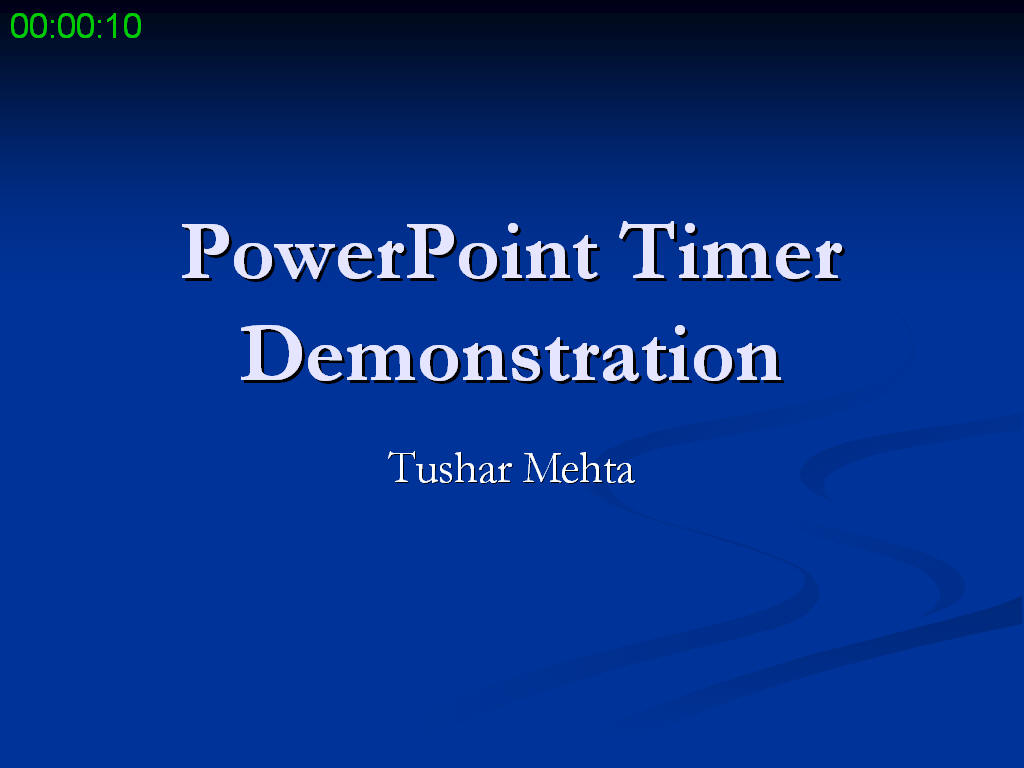
2) show the presentation elapsed time
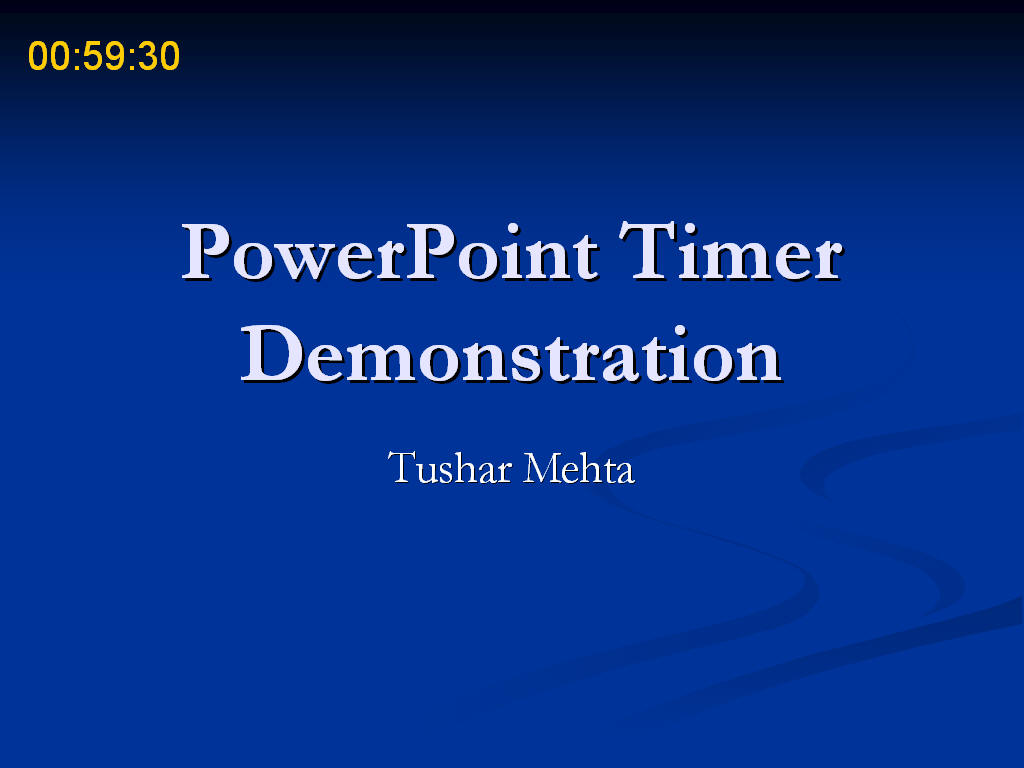
3) or, it count down the time remaining for the presentation.
Optionally, it can terminate the presentation at the end of a separately configurable grace period.
Customize various attributes of the time display -- see the Customization and Configuration section.
Download either the self-installer executable or the zip file.
If you download the self-installer executable, double click the file to start the installer. By default, it will offer to install the add-in the AddIns folder on your computer. You may want to simply accept the default choice.
If you download the zip file. unzip it and extract the files to a location of your choice. Please ensure you save all the files, including the help file, in the same folder.
Office programs have a default location that might be an useful location for this add-in. Microsoft has changed the location of this folder over time. To locate this folder on your computer, open PowerPoint, then select Tools | Add-Ins (or the equivalent in the Ribbon interface). In the Add-Ins dialog box, click the Add New.. button. This will open in the default folder used by PowerPoint for add-ins.
To ensure you use the correct security settings and to install and load the add-in, see Common Installation Instructions for Office add-ins
There are two aspects to the customization of the display. The first is how the information is shown, the second is what is shown.
As mentioned in the section on Purpose, the add-in can show either the time of the day, the elapsed time of the presentation, or a countdown timer for the presentation. Configure this and other choices through the Presentation Timer dialog box.
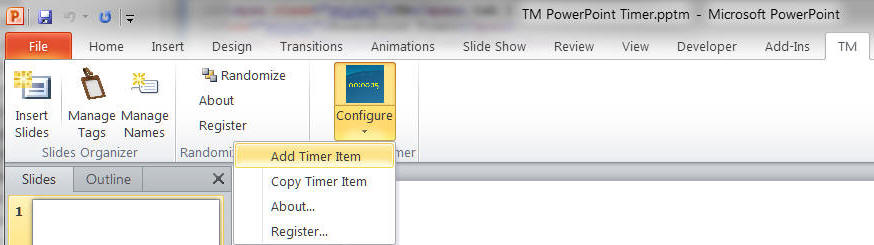
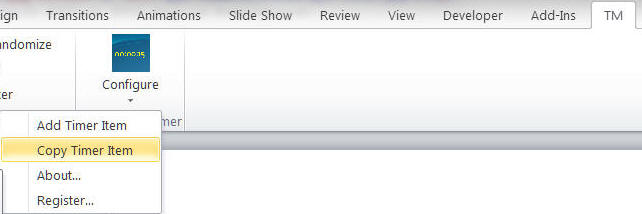
In 2007 or 2010 use TM tab | PowerPoint Timer group | Configure button.

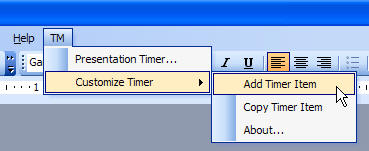
In 2003 or earlier, use TM menu | Presentation Timer... button to access the dialog box.
This will bring up the Configure dialog box. The dialog box has three tabs:
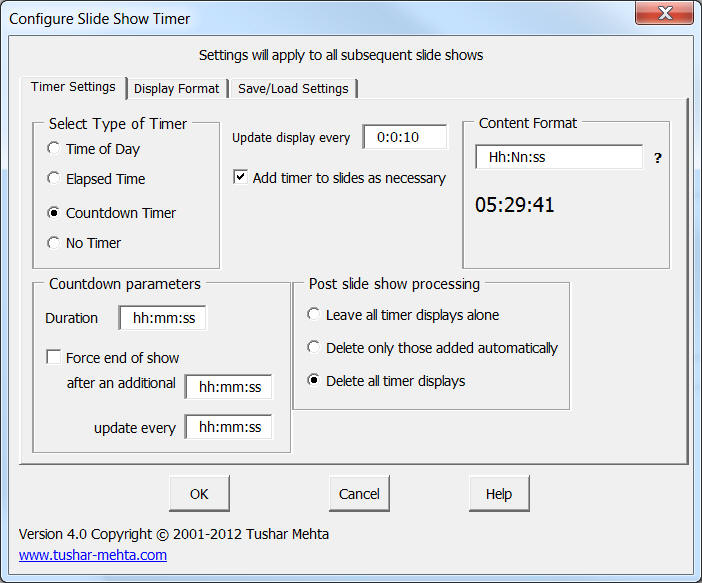
In the Select Type of Timer section specify the kind of display desired.
The Count down Parameters section in the left-hand bottom applies for a countdown timer. It lets one configure various countdown options, including the ability to forcibly end the show after a grace period that starts after the regular countdown reaches zero.
Use the Update display every textbox to specify how often the add-in should update the display during the slide show.
Select Add timer to slides as necessary to add the timer box to a slide that does not have a custom box in it. Selecting this box provides the same behavior as in the previous version of the add-in.
The Post slide show processing options deal with how the add-in handles the timer textbox after a slide show is over. Selecting the last item Delete all timer displays maintains compatibility with the previous version of the add-in.
The Content Format textbox allows one to specify what is shown. This is new to version 4. A sample based on the content of the textbox is shown just below the textbox. For more on what one can enter in this textbox see Choices for Content Format.
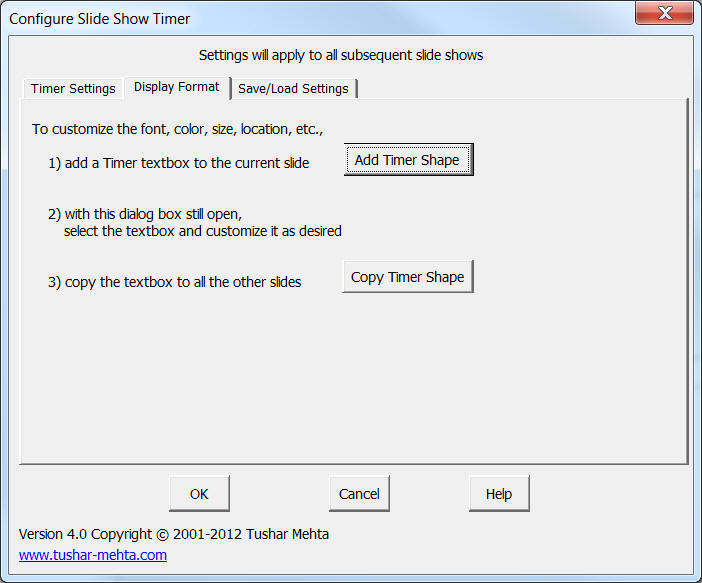
This Display Format tab allows one to change how the timer display is shown. The Add Timer Shape and the Copy Timer Shape buttons mimic the functionality of the Add Timer Item and the Copy Timer Item buttons in the ribbon (or the menu). Both items are explained in the Customize the Display Format section.
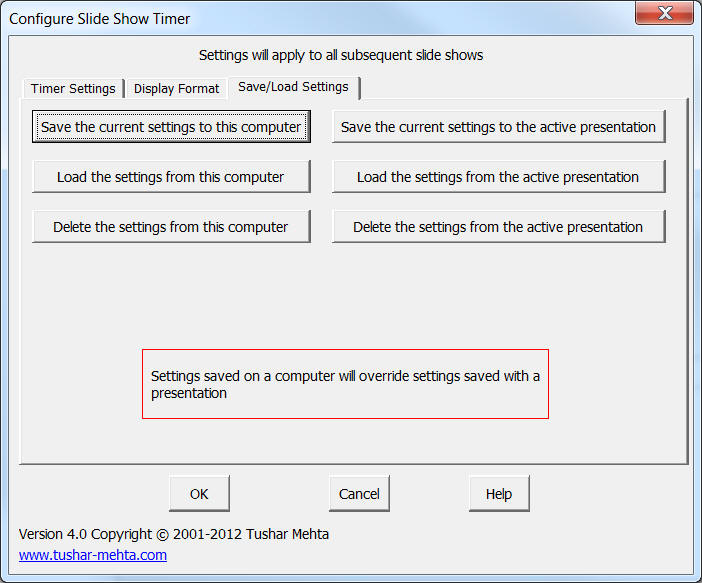
The buttons in the Save/Load Settings tab allows one to save the current configuration in either the active presentation or in the registry of the computer. One can also load the configuration saved earlier or delete a saved configuration.
Note that this saves only the information entered in this dialog box, and not display format customization, if any. To save the latter see the section Save the custom textboxes.
The add-in displays the user selected time information in a custom textbox that it adds to every slide. Putting the textbox on each slide adds tremendous flexibility in terms of how the time is displayed -- or not displayed -- on a slide-by-slide basis. At the same time, this customization is completely optional. If during a slideshow no custom textbox is available on a slide, the add-in can create and use a default box.
Customizing the display format is a two-step process, with two more optional steps, the last of which .
In addition, saving the customized formatting is optional. See the Save the customization section for more.
Step 1: add the textbox needed for the time display.
In 2007 or 2010 select TM tab | PowerPoint Timer group | Configure dropdown | Add Timer Item button. [One can also do this from the Configure Slide Show Timer dialog box | Display Format tab | Add Timer Shape button.]
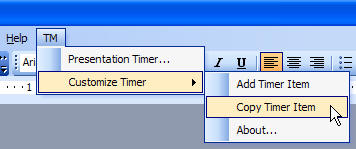
In 2003 or earlier, select the menu item TM | Customize Timer > Add Timer Item
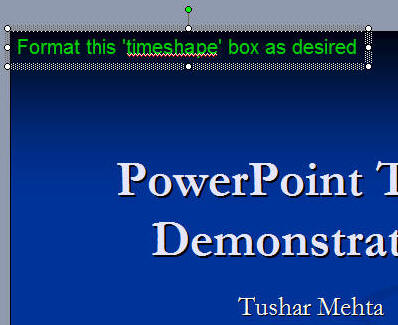
The result is a textbox on the slide:
Format the text as desired (font, size, color, etc.) Position the textbox as desired. In the example below, the textbox was moved to the top-left corner of the slide and the text formatted as Arial 18 point font and colored green.
Step 2: once the textbox is satisfactorily formatted duplicate this textbox on all the other slides.
In 2007 or 2010 use TM tab | PowerPoint Timer group | Configure dropdown | Copy Timer Item button. [One can also do this from the Configure Slide Show Timer dialog box | Display Format tab | Copy Timer Shape button.]
In 2003 use the TM | Customize Timer > Copy Timer Item menu item.
Step 3: Optionally, customize the textbox on individual slides. This is particularly useful if you do not want to show the time on a specific slide. Just select the textbox and move it off the slide.
Save the presentation after you have completed the above customizations and before running the slideshow. This is because during a slideshow the add-in modifies the textbox in which it displays the time. In addition, and depending on the options specified in the Configure what to show section, the add-in may delete all the timer related textboxes. In this scenario, any customizations that were not saved before the slideshow started will be lost.
One can enter any valid format acceptable to PowerPoint in the Content Format textbox. The add-in will accept anything that is typed into the textbox and the result appears in the dialog box just below the Content Format textbox. Valid strings for the textbox are shown in the table below, which is essentially from the system documentation.
| Character | Description |
|---|---|
| (:) | Time separator. In some locales, other characters may be used to represent the time separator. The time separator separates hours, minutes, and seconds when time values are formatted. The actual character used as the time separator in formatted output is determined by your system settings. |
| (/) | Date separator. In some locales, other characters may be used to represent the date separator. The date separator separates the day, month, and year when date values are formatted. The actual character used as the date separator in formatted output is determined by your system settings. |
| c | Display the date as ddddd and display the time as
ttttt, in that order. Display only date information if there is
no fractional part to the date serial number; display only time
information if there is no integer portion. |
| d | Display the day as a number without a leading zero (1 � 31). |
| dd | Display the day as a number with a leading zero (01 � 31). |
| ddd | Display the day as an abbreviation (Sun � Sat). |
| dddd | Display the day as a full name (Sunday � Saturday). |
| ddddd | Display the date as a complete date (including day, month, and
year), formatted according to your system's short date format setting.
The default short date format is m/d/yy. |
| dddddd | Display a date serial number as a complete date (including day,
month, and year) formatted according to the long date setting recognized
by your system. The default long date format is mmmm dd, yyyy. |
| aaaa | The same as dddd, only it's the localized version of the string. |
| w | Display the day of the week as a number (1 for Sunday through 7 for Saturday). |
| ww | Display the week of the year as a number (1 � 54). |
| m | Display the month as a number without a leading zero (1 � 12). If m immediately follows h
or
hh, the minute rather than the month is displayed.
|
| mm | Display the month as a number with a leading zero (01 � 12). If
m immediately follows h
or
hh, the minute rather than the month is displayed. |
| mmm | Display the month as an abbreviation (Jan � Dec). |
| mmmm | Display the month as a full month name (January � December). |
| oooo | The same as mmmm, only it's the localized version of the string. |
| q | Display the quarter of the year as a number (1 � 4). |
| y | Display the day of the year as a number (1 � 366). |
| yy | Display the year as a 2-digit number (00 � 99). |
| yyyy | Display the year as a 4-digit number (100 � 9999). |
| h | Display the hour as a number without leading zeros (0 � 23). |
| Hh | Display the hour as a number with leading zeros (00 � 23). |
| N | Display the minute as a number without leading zeros (0 � 59). |
| Nn | Display the minute as a number with leading zeros (00 � 59). |
| S | Display the second as a number without leading zeros (0 � 59). |
| Ss | Display the second as a number with leading zeros (00 � 59). |
| t t t t t | Display a time as a complete time (including hour, minute, and
second), formatted using the time separator defined by the time format
recognized by your system. A leading zero is displayed if the leading
zero option is selected and the time is before 10:00 A.M. or P.M. The
default time format is h:mm:ss. |
| AM/PM | Use the 12-hour clock and display an uppercase AM with any hour before noon; display an uppercase PM with any hour between noon and 11:59 P.M. |
| am/pm | Use the 12-hour clock and display a lowercase AM with any hour before noon; display a lowercase PM with any hour between noon and 11:59 P.M. |
| A/P | Use the 12-hour clock and display an uppercase A with any hour before noon; display an uppercase P with any hour between noon and 11:59 P.M. |
| a/p | Use the 12-hour clock and display a lowercase A with any hour before noon; display a lowercase P with any hour between noon and 11:59 P.M. |
| AMPM | Use the 12-hour clock and display the AM string literal as defined by your system with any hour before noon; display the PM string literal as defined by your system with any hour between noon and 11:59 P.M. AMPM can be either uppercase or lowercase, but the case of the string displayed matches the string as defined by your system settings. The default format is AM/PM. |
The customization and configuration settings specified before starting a slide show control what is shown on each slide and how it is shown. Also, if the 'force end of show' option of the countdown timer is in effect, the slide show will be stopped at the end of the grace period.
The add-in comes with a 30 day trial period. After that please register it at www.tmehta.com/paypal.
You can reach the author through his web site at www.tushar-mehta.com

