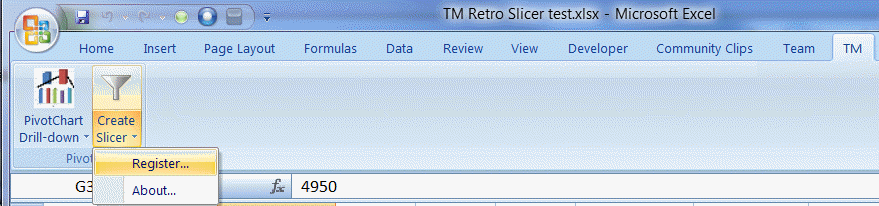
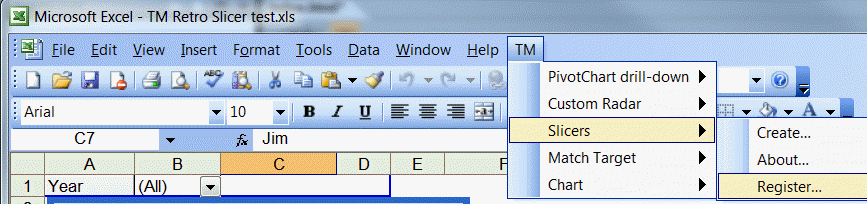
The TM Retro Slicer dialog box
With Excel 2010, Microsoft introduced something it calls a slicer. This is an independent object that acts as a filter for a PivotTable (and its associated PivotChart, if any). TM Retro Slicer enables some of the features of a slicer in older versions of Excel particularly Excel 2007 and Excel 2003. For example, Figure 1 shows a PivotTable shows the number of scans done only for specific technologists (those whose names appear in a blue background in the slicer).
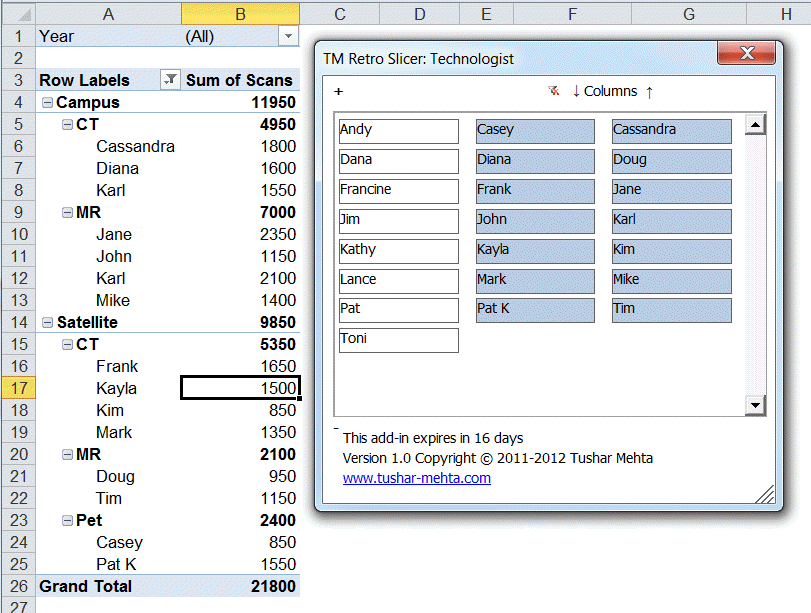
Figure 1
A PivotTable can have multiple slicers filtering data in it. Also, the slicer object is customizable in terms of the number of columns used to show the item values. For example, Figure 2 shows the PivotTable filtered to show data for all technologists other than Cassandra and to show data only for CT and Pet scans.
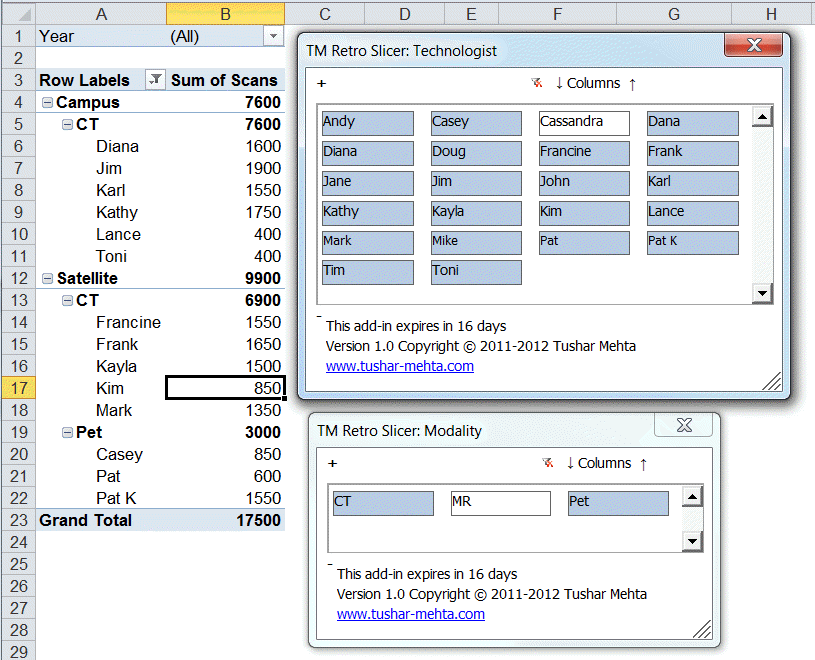
Figure 2
While Excel supports filters for pivot fields, the UI is less that friendly. The Slicer UI, on the other hand, is very easy to understand and use.
One feature that Excel does not support natively is filtering data on fields not present in the PT. The 2010 slicer enables this capability. With TM Retro Slicer one can also add a slicer for an element not present in the PivotTable. However, to make the slicer work correctly, the add-in will add this element as a page field in the PT.
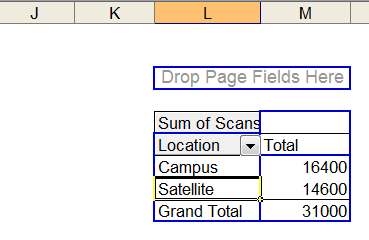
Figure 3 -- An Excel 2003 PivotTable before adding slicers for fields not
already present in the PT
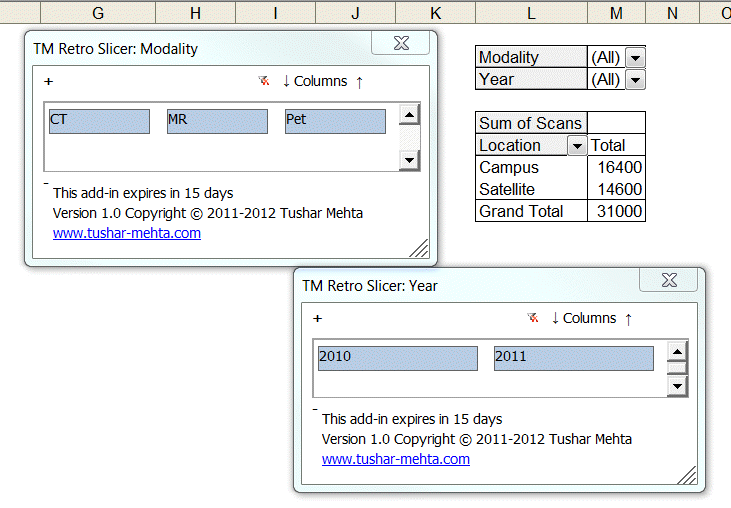
Figure 4 -- After adding slicers for fields not already present in the
PivotTable;
the add-in adds these fields as page fields
Note that the self-installer version also installs an uninstall capability. To uninstall select scroll down to the entry.
If you chose to download the zip version, unzip the add-in file to a directory of your choice.
For installation instructions see common installation instructions. In Excel 2003 load the add-in. In Excel 2007 or later, load the add-in.
In Excel 2007 or later, select tabgroupbutton. This will bring up the TM Retro Slicer dialog box. Another way to get to the dialog box is to click inside an existing PivotTable, then select PivotTable Tools context menu | tab | group | button.
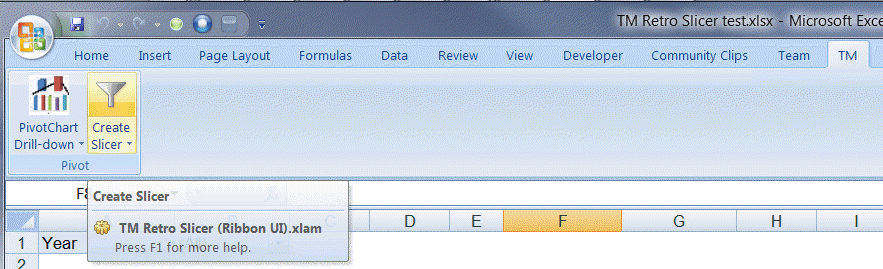
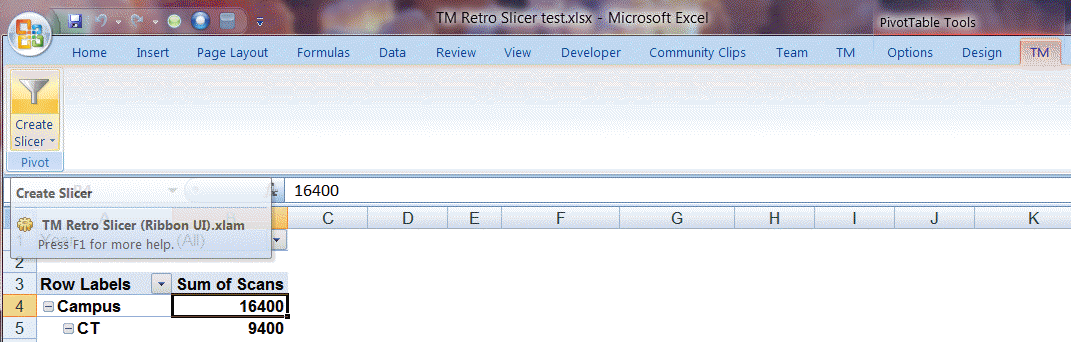
Figure 5
In Excel 2003 or earlier, select or click inside a PivotTable then select toolbar dropdown
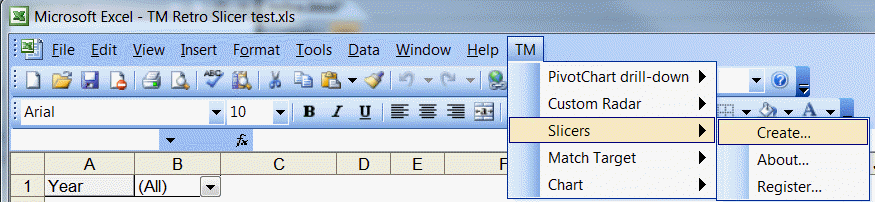
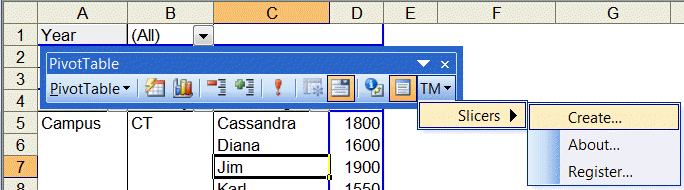
Figure 6
This will bring up the TM Retro Slicer dialog box (Figure 7).
To create a slicer select a workbook, a worksheet in it, a PivotTable in that worksheet, and a field in that PivotTable. To the extent possible, the add-in will pre-select the choices in the various dropdowns. So, if the current selection is a range within an existing PivotTable, the first three dropdowns will have selections already made. Of course, those choices can be changed as required.
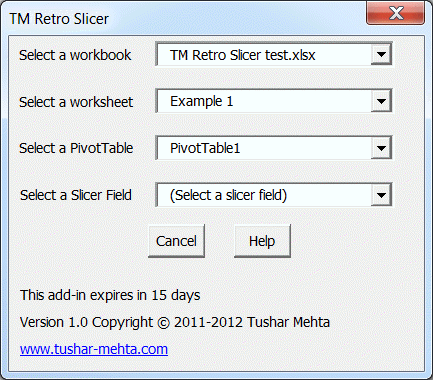
Figure 7
Select a field from the Slicer Field dropdown to enable the slicer for that PivotTable field. Note there is no 'OK' button. Simply select an item from the Slicer Field dropdown to create the corresponding slicer.
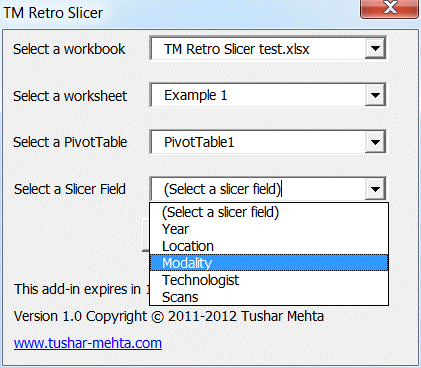
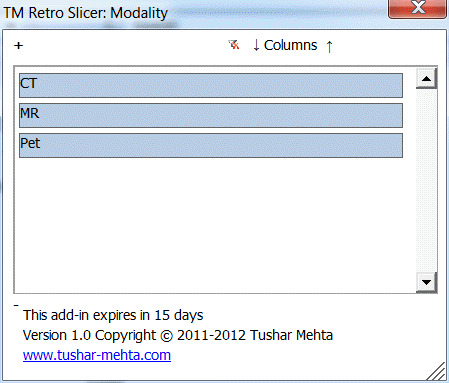
Figure 8
A slicer is essentially an easy-to-use filter associated with a field in the PivotTable. The slicer UI has one button for every value in the field. If the value has a blue background it is included in the PT. If it has a white background, it is filtered out.
For example in Figure 9, the Modality slicer shows items for all values of Modality. By contrast, Figure 10 shows only the CT and MRI values.
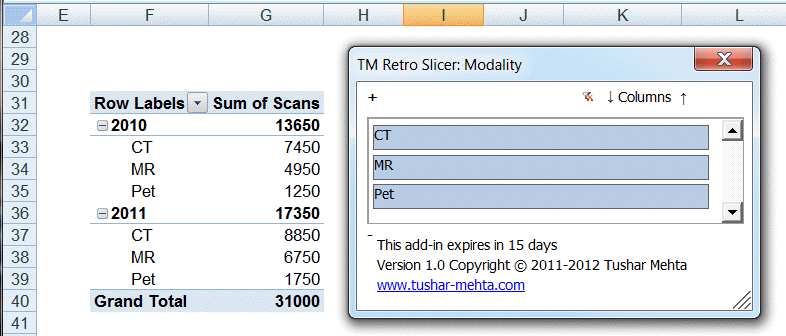
Figure 9
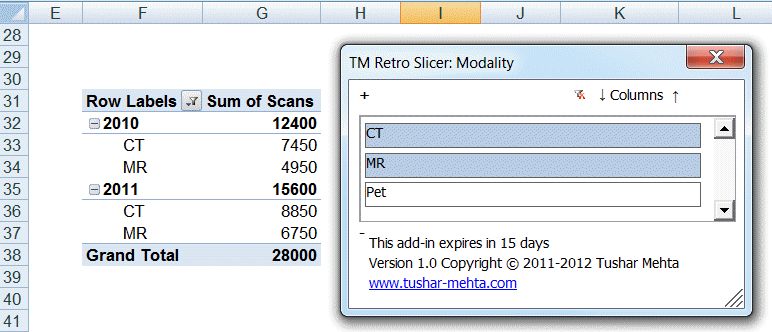
Figure 10
There are several buttons in the slicer that make it easy to interact with it. Figure 11 shows the locations of the various buttons. Click on any of the blue rectangle around the buttons to learn more about their respective functions.
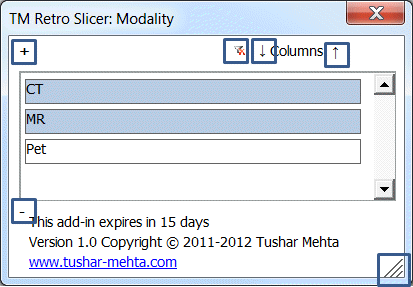
Figure 11 -- Hover
over, or click, any blue rectangle for more on that button
Clear all filters for this slicer: Click this button to quickly clear all the filtered values for this slicer. The PivotTable will show all values for the slicer field.
Increase number of columns shown: Click on the up-arrow to have the add-in use more columns to show field values.
A slicer with a single column:
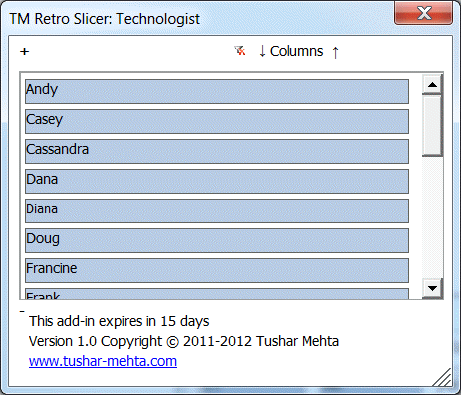
Click the up-arrow to see one more column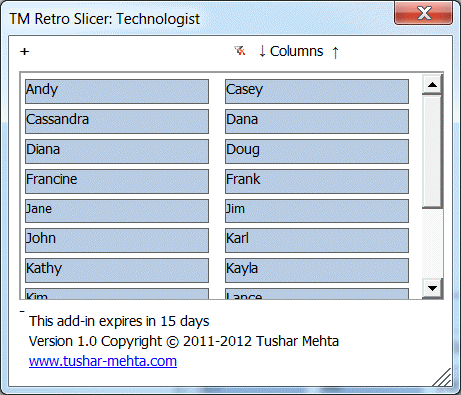
Each click on the up-arrow adds yet another column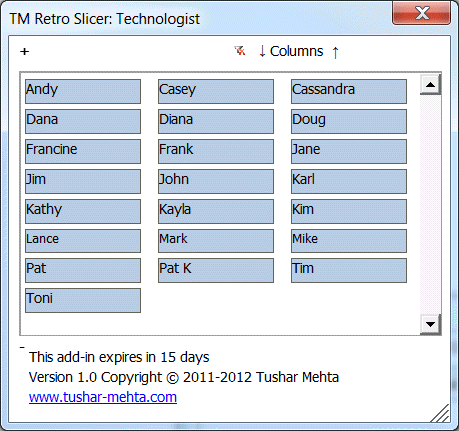
Figure 12
Decrease number of columns shown: Click on the down-arrow to use one less column to show the field values.
Hide / show slicer and add-in status: To make more real-estate available to the consumer, use the - button to temporarily hide the the information about the slicer and the add-in.
Resize the slicer: Drag to increase or decrease the slicer object size. If not all items in a column are visible, use the scroll bar to move up or down.
Future development : This button is reserved for future development
The add-in comes with a trial period. To continue using the add-in after this trial period, please register it from the add-in's web page. Once you get the registration key, use the Register... button to add the key to the add-in.