This chapter addresses two important elements that a developer should consider when designing a userform module. The first focuses on the design of the code – which is distinct from principles of what constitutes good design for interacting with a person. The second focuses on having a user provide a range reference in a userform.
“Userform code interface design” refers to how one designs the interface between the userform code and the code in the rest of the add-in. This is a severely overlooked area worth spending some time over since the payoff can be substantial. As we will see, a properly designed interface separates the requirements and limitations of using a userform from the requirements and limitations of the data acquired through the userform. It does so at two levels. The first is in validating the information provided through the userform and the second is in how it processes the validated data.
Following the principles outlined in this section will make it easier to understand, debug, and maintain an add-in. In addition, it facilitates what very few people ever do with an add-in: the ability to export functions and capabilities (very much like a method associated with an object) that other programs can leverage!
The key to developing good principles vis-à-vis userform interface design is to ignore the default capabilities provided by Microsoft! Giving it the benefit of doubt, it appears that Microsoft designed userforms in a way that it thought would simplify the developer’s work. And, it appears to do so, especially for the beginner programmer. Unfortunately, the very techniques that one is inclined to use with userforms are those that violate many of the principles of good software development.
The rest of the section is organized as follows:
The default design encouraged by Microsoft’s implementation of userforms discusses why the development technique encouraged by Microsoft’s design of userforms leaves a lot to be desired. In particularly, we will see how it encourages the intertwining of userform requirements with those of the rest of the add-in.
The first improvement explores an intuitive “next” step which resolves the intertwining concerns. Yet, it doesn’t quite address the concerns associated with acquiring multiple pieces of data or the concerns associated with the validation of the data, specifically, the separation of the business logic from the userform logic.
Introducing structured data introduces structured data using a User Defined Type (UDT) to cover the acquisition of multiple data elements.
Creating a structured data type with a class module uses an object to create a more flexible structured data type.
Introducing business validation logic addresses the separation of userform logic from business logic in the context of validation.
A userform design model for forms shown modeless lays out a design that works with a userform shown modeless while still retaining the structured and modular design.
Finally, A (nearly) identical userform code template for userforms shown modeless or modal introduces a structure that is easily adaptable to a userform that is shown either modal or modeless.
For those who haven’t quite realized it yet, a userform is implemented in VB(A) as a special type of an object. One of the ways in which it is special is that the elements in the object – the properties and methods of the userform as well as every developer added control and its properties and methods – are public. While Microsoft may have meant well with this approach, it encourages very poor design choices. Let’s start with a very simple example.
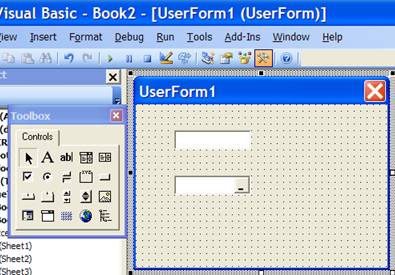
In this example, we want to display a userform named Userform1 with one label with the caption Please enter a number, one textbox named TextBox1, one button named OK with the caption that reads OK, and a similarly named and captioned button for ‘Cancel.’ We want the user to enter a number. One way of writing code that works just fine would be to add the below subroutine in a normal module. The code loops until one of two things happen. Either the user cancels the userform (in which case OKClicked will be False) or the user enters legitimate data and clicks OK.
Sub getNumberFromUser()
Dim AllDone As Boolean
Do
With UserForm1
.Show
If Not .OKClicked Then
AllDone = True
ElseIf .TextBox1.Text = "" Then
Beep
ElseIf Not IsNumeric(.TextBox1.Text) Then
Beep
Else
MsgBox "You entered the number " & .TextBox1.Text
AllDone = True
End If
End With
Loop Until AllDone
End Sub
The corresponding code in the userform module is:
Option Explicit
Public OKClicked As Boolean
Private Sub Cancel_Click()
OKClicked = False: Me.Hide
End Sub
Private Sub OK_Click()
OKClicked = True
Me.Hide
End Sub
The problem with the above is that it intermixes the task of handling the userform with the larger task of the add-in. Consequently, if we make any changes to the userform design, we would have to worry about how those changes interact with the other logic. For example, imagine we want to restrict the user to a set of predetermined values. Given this additional restriction, the UI can be improved by replacing the textbox with a listbox. However, this would require us to modify the code in getNumberFromUser. And, that is completely unjustified since we could – and should – separate the task of getting data from the user with how we process that data.
As a first pass, suppose we add a public function in the code module for Userform1 named getData. This function would return a Boolean value of True if the user provided valid information and False if the user canceled the userform. It would also have a byref argument of type double. If the function returned TRUE, this variable would contain the user provided number. Consequently, getNumberFromUser is greatly simplified:
Option Explicit
Sub getNumberFromUser()
Dim UserNumber As Double
If UserForm1.getData(UserNumber) Then
MsgBox "Your number is " & UserNumber
End If
End Sub
We can further modularize the above code and we should because the typical processing of the user provided data is a lot more complex than regurgitating it with a MsgBox. Consequently, we get
Sub processUserData(ByVal UserNumber As Long)
MsgBox "Your number is " & UserNumber
End Sub
Sub Main()
Dim StartInvoiceNumber As Long
If UserForm1.getData(StartInvoiceNumber) Then
processUserData StartInvoiceNumber
End If
End Sub
Of course, the code in the userform module is correspondingly more complex. Nonetheless, we have taken a major step in separating the code required to manage the userform from the code required to perform the task of the add-in. The userform code would be:
Option Explicit
Public OKClicked As Boolean
Private Sub Cancel_Click()
OKClicked = False: Me.Hide
End Sub
Private Sub OK_Click()
OKClicked = True
Me.Hide
End Sub
Function EditOK(ByRef UserNumber As Long) As Boolean
'As the name implies, EditOK will be true if the data validate OK _
In that case, the ByRef parameter contains valid data.
With Me
If .TextBox1.Text = "" Then
Beep
Exit Function
ElseIf Not IsNumeric(.TextBox1.Text) Then
Beep
Exit Function
End If
EditOK = True
UserNumber = CLng(.TextBox1.Text)
End With
End Function
Public Function getData(ByRef UserNumber As Long) As Boolean
Dim AllDone As Boolean
Do
With Me
.Show
If Not OKClicked Then
'user canceled the userform; we should exit ASAP
AllDone = True
ElseIf EditOK(UserNumber) Then
AllDone = True
End If
End With
Loop Until AllDone
getData = OKClicked
End Function
In the code above, since the userform is shown modal, code execution is suspended at the .Show until the user dismisses the userform. The user does that by clicking either the OK or the Cancel button. In the first case, the OKClicked variable is TRUE and we should validate the input, which we do through the call to the EditOK function. On the other hand, if the user canceled the userform, we don’t validate the input. Instead we simply return False as the value of the getData function.
Clearly, with the above design the main code no longer knows – or cares! – how one acquires information from the user. One could easily replace the textbox in the userform with a listbox or a combobox. In fact, we could use the application’s InputBox method and never show the userform; the main code would never know the difference!
In the above example, there was only one data item that we wanted the user to provide. But, that is far from typical. In most cases, a userform requires the user to provide multiple pieces of information. In keeping with the above design, we could modify the arguments to the getData function to include that many variables. So, if we wanted the user to provide us with a StartInvoiceNumber and a EndInvoiceNumber, we could use the function getData2:
Public Function getData2(ByRef StartInvoiceNumber As Long, _
ByRef EndInvoiceNumber As Long) As Boolean
Dim AllDone As Boolean
Do
With Me
.Show
If Not OKClicked Then
'user canceled the userform; we should exit ASAP
AllDone = True
ElseIf Not EditOK(StartInvoiceNumber) Then
ElseIf Not EditOK(EndInvoiceNumber) Then
Else
AllDone = True
End If
End With
Loop Until AllDone
getData2 = OKClicked
End Function
The corresponding main module would look like:
Sub processUserData2(ByVal StartInvoiceNumber As Long, _
ByVal EndInvoiceNumber As Long)
MsgBox "Start Invoice Number: " & StartInvoiceNumber _
& ", End Invoice Number: " & EndInvoiceNumber
End Sub
Sub getNumberFromUser2()
Dim StartInvoiceNumber As Long, EndInvoiceNumber As Long
If UserForm1.getData2(StartInvoiceNumber, EndInvoiceNumber) Then
processUserData2 StartInvoiceNumber, EndInvoiceNumber
End If
End Sub
However, this could quickly get unwieldy if we had 5 or 6 or more pieces of data. Instead, we should create and use a structured data type. One possible way to do this is through the Type declaration and its subsequent use in the getInvoiceDataFromUser3 subroutine
Type InvoiceUserDataType
StartInvoiceNumber As Long
EndInvoiceNumber As Long
End Type
Sub processUserData3(InvoiceUserData As InvoiceUserDataType)
With InvoiceUserData
MsgBox "Start Invoice Number: " & .StartInvoiceNumber _
& ", End Invoice Number: " & .EndInvoiceNumber
End With
End Sub
Sub getNumberFromUser3()
Dim InvoiceUserData As InvoiceUserDataType
If UserForm1.getData3(InvoiceUserData) Then
processUserData3 InvoiceUserData
End If
End Sub
We would have to make corresponding changes in the userform code module. Note something very important. There is no change to the overall structure in either the getData2 routine above or the getData3 routine below. The changes from the original getData are limited to the variable declarations and to the call to the validation routine!
Public Function getData3( _
ByRef InvoiceUserData As InvoiceUserDataType) As Boolean
Dim AllDone As Boolean
Do
With Me
.Show
If Not OKClicked Then
'user canceled the userform; we should exit ASAP
AllDone = True
ElseIf EditOK3(InvoiceUserData) Then
AllDone = True
End If
End With
Loop Until AllDone
getData3 = OKClicked
End Function
There are changes to the EditOK function in the userform’s code module but those are largely because we now have two fields to validate instead of the previous one. Rather than duplicate the validation code for one textbox, we will create a new function to validate a single field. Then, EditOK3 will simply call this function twice with a different set of arguments.
Function validateOneField(aTextBox As MSForms.TextBox, _
ByRef ReturnedVal As Long) As Boolean
If aTextBox.Text = "" Then
Beep
aTextBox.SetFocus
Exit Function
ElseIf Not IsNumeric(aTextBox.Text) Then
Beep
aTextBox.SetFocus
Exit Function
End If
validateOneField = True
ReturnedVal = CLng(aTextBox.Text)
End Function
Function EditOK3(ByRef InvoiceUserData As InvoiceUserDataType) As Boolean
'As the name implies, the function will be true if the data validate OK _
In that case, the ByRef parameter will contain valid data.
If Not validateOneField(Me.TextBox1, _
InvoiceUserData.StartInvoiceNumber) Then Exit Function
If Not validateOneField(Me.TextBox2, _
InvoiceUserData.EndInvoiceNumber) Then Exit Function
EditOK3 = True
End Function
With the above structured data type, we could easily ask the user for several pieces of data and yet make minimal changes to the overall program structure.
An alternative to a user data type is to create a very basic class module. The simplest of class modules would contain nothing but public variables of the appropriate type. In a class module named clsInvoiceUserData add the following code.
Option Explicit
Public StartInvoiceNumber As Long, EndInvoiceNumber As Long
We create an object of the above class and use it in a manner nearly identical to how we use a user data type as in the previous section. Actually, with the exception of initializing the object, the usage is identical.
Sub processUserData4(InvoiceUserData As clsInvoiceUserData)
With InvoiceUserData
MsgBox "Start Invoice Number: " & .StartInvoiceNumber _
& ", End Invoice Number: " & .EndInvoiceNumber
End With
End Sub
Sub Main4()
Dim InvoiceUserData As clsInvoiceUserData
Set InvoiceUserData = New clsInvoiceUserData
If UserForm1.getData4(InvoiceUserData) Then
processUserData4 InvoiceUserData
End If
End Sub
Note that with the exception of the new Set statement and the data type used in the Dim statement, the code in Main4 and ProcessData4 is identical to that in Main3 and ProcessData3 respectively. We would like to believe that the same holds for the userform code – and it would be nearly true. There is a slight problem when one uses a class element with a ByRef argument. For some reason VB(A) does not return the updated value to the calling procedure. So, we are forced to use an intermediate local variable in the EditOK4 routine. But, other than this glitch (while I would call it a bug I cannot be sure Microsoft will agree), the code in getData4 and EditOK4 is identical to getData3 and EditOK3 – with the obvious exception of the data type.
Function EditOK4(ByRef InvoiceUserData As clsInvoiceUserData) As Boolean
'As the name implies, the function will be true if the data validate OK _
In that case, the ByRef parameter will contain valid data.
'For some reason, if we pass a class element, such as _
InvoiceUserData.StartInvoiceNumber, as a byRef argument to _
validateOneField, VB(A) does not return the updated value back to _
this routine. So, we use a temporary intermediate variable, Val.
Dim Val As Long
If Not validateOneField(Me.TextBox1, _
Val) Then Exit Function
InvoiceUserData.StartInvoiceNumber = Val
If Not validateOneField(Me.TextBox2, _
Val) Then Exit Function
InvoiceUserData.EndInvoiceNumber = Val
EditOK4 = True
End Function
Public Function getData4( _
ByRef InvoiceUserData As clsInvoiceUserData) As Boolean
Dim AllDone As Boolean, ErrMsg As String
Do
With Me
.Show
If Not OKClicked Then
'user canceled the userform; we should exit ASAP
AllDone = True
ElseIf EditOK4(InvoiceUserData) Then
AllDone = True
End If
End With
Loop Until AllDone
getData4 = OKClicked
End Function
There are advantages to using an object over a user data type and in the rest of this chapter we will use the former. While most of the advantages are outside the scope of this chapter, one worth mentioning is that in certain cases we are unable to pass a UDT as an argument to a procedure whereas we can do so with an object.
So far, the validation code in the userform has been rather rudimentary. We restricted ourselves to verifying that where we expected numbers the user did provide us with numbers. But, typical validation goes well beyond such basics. In the case of getting two invoice numbers, we might want to verify that the start number is not greater than the end number. We might also want to verify that these invoices actually do exist. Also, in the above discussion, we emphasized the importance of separating the acquisition of data through the userform from the other business-oriented logic. In keeping with that spirit, we should not include the business-oriented validation logic in the userform code module.
Start with a new standard module. Name it BusinessLogicValidation. Add to it the code to validate the user provided data.
Option Explicit
Function InvoiceExists(InvoiceNumber As Long) As Boolean
'Look up the Invoice table and return true if we found the invoice
'In the prototype version we always return True
InvoiceExists = True
End Function
Function ValidateUserDataWithDB( _
InvoiceUserData As clsInvoiceUserData, ByRef ErrMsg As String) As Boolean
'Verify that the StartInvoiceNumber is less than the EndInvoiceNumber. _
Also, look up the Invoice table and confirm that the invoice _
numbers actually exist.
With InvoiceUserData
If .StartInvoiceNumber > .EndInvoiceNumber Then
ErrMsg = "End Invoice Number must be greater than Start Invoice Number"
Exit Function
End If
If Not InvoiceExists(.StartInvoiceNumber) Then
ErrMsg = "Start Invoice Number does not exist"
Exit Function
End If
If Not InvoiceExists(.EndInvoiceNumber) Then
ErrMsg = "End Invoice Number does not exist"
Exit Function
End If
ValidateUserDataWithDB = True
End With
End Function
Because we have maintained a highly modular code organization, we have to make only a minimal change to the userform code module. In the getData4 subroutine, if the user data pass the minimal standards established by the userform code, we call the validateUserDataWithDB function. If that function returns True, we know that we have really valid data. If not, we display the error message returned and await the next user action.
Public Function getData4( _
ByRef InvoiceUserData As clsInvoiceUserData) As Boolean
Dim AllDone As Boolean, ErrMsg As String
Do
With Me
.Show
If Not OKClicked Then
'user canceled the userform; we should exit ASAP
AllDone = True
ElseIf Not EditOK4(InvoiceUserData) Then
ElseIf ValidateUserDataWithDB(InvoiceUserData, ErrMsg) Then
AllDone = True
Else
MsgBox ErrMsg
End If
End With
Loop Until AllDone
getData4 = OKClicked
End Function
There are two other major benefits of the above design. First, we can adapt the architecture to instances when we display a userform modeless. Second, we can make the functionality of this addin available to other programs…by adding two small functions and with no change to the existing code!
So far our display of the userform was modal. This happened with the .Show statement. When a userform is shown modal, the user cannot interact with the application – and execution of our code is also suspended – at the .Show statement until the user dismisses the userform. Because code execution is suspended, we could afford to validate the data after the user dismissed the form. This kind of programming is also known as procedural programming in that the developer knows and controls the sequence of events that the user experiences.
But, when a userform is shown modeless (with .Show vbModeless), code execution is not suspended. So, if we retained the above structure in the getData routine, the validation code would execute immediately after we displayed the userform! Clearly, that is unacceptable. Further, since we cannot sequentially validate the user input we cannot sequentially process the user provided data. So, our Main routine will also have to change. This one seemingly trivial change to the Show method, i.e., adding vbModeless as an argument, requires a dramatic shift in our programming paradigm from the comfortable world of procedural programming to one that is event driven.
In event driven programming, the user controls the sequence of events. Consequently, the code must be rewritten so that we validate the data and process valid data only when the user tells us to do so. Fortunately for us, given the highly modular design advocated in this chapter, it should come as no real surprise that we can make the necessary shift with minimal changes to our overall structure.
Let’s start by examining our existing assets. We have a processUserData subroutine that takes a structured data type as an argument and does the primary task of the add-in. We have a validateUserdataWithDB function that takes the same structured data type as an argument and applies business logic to validate the user-provided data. Within the userform code module we have a EditOK function that takes the same structured data type as an argument and carries out basic validation of the user-provided data.
Given these three key assets, all we have to do is reorganize our code so that we call these assets only after the user clicks the OK button thereby telling us to process the userform data.
The two changes to the userform code module are below. The OK_Click subroutine now makes the three calls we discussed. The showModeless method simply displays the userform modeless.
Private Sub OK_Click()
Dim InvoiceUserData As New clsInvoiceUserData
If Not EditOK4(InvoiceUserData) Then Exit Sub
Dim ErrMsg As String
If Not ValidateUserDataWithDB(InvoiceUserData, ErrMsg) Then
MsgBox ErrMsg
Exit Sub
End If
Me.Hide
processUserData4 InvoiceUserData
End Sub
Public Sub showModeless()
Me.Show vbModeless
End Sub
The change to the standard module is equally trivial. The Main subroutine simply calls the showModeless method and exits.
Sub Main5()
UserForm1.showModeless
End Sub
There is a certain elegance to the userform code in the previous section. [There is no ungainly loop which hides the userform, validates the contents, and shows it again if necessary.] It would be beneficial if we had a similar code structure for userforms shown modal and modeless. Both these are obviously possible. We can adapt the code layout used for the modeless display to a modal display quite easily. Keep in mind that with a modal display code execution is suspended at the .Show statement, though the event driven code in the OK_Click and Cancel_Click subroutines will run when the user clicks the appropriate button. So, we will validate the data in the OK_Click routine as in the previous section. Then, for valid results we will store the information in a variable in the userform code module and hide the userform. This will resume execution of the suspended code, which will then return the already validated data to the caller. Note how similar the userform module code below is to that used for a userform displayed modeless.
Dim myInvoiceUserData As clsInvoiceUserData
Private Sub Cancel_Click()
OKClicked = False: Me.Hide
End Sub
Private Sub OK_Click()
Set myInvoiceUserData = New clsInvoiceUserData
If Not EditOK4(myInvoiceUserData) Then Exit Sub
Dim ErrMsg As String
If Not ValidateUserDataWithDB(myInvoiceUserData, ErrMsg) Then
MsgBox ErrMsg
Exit Sub
End If
OKClicked = True
Me.Hide
End Sub
Public Function getData6( _
ByRef InvoiceUserData As clsInvoiceUserData) As Boolean
Me.Show
If OKClicked Then
Set InvoiceUserData = myInvoiceUserData
getData6 = True
End If
End Function
Of course, as far as the main logic goes, there should be absolutely no change from the last instance above where we displayed the userform modal – and, there isn’t! Well, other than to account for the new name of the getData function.
Sub Main6()
Dim InvoiceUserData As clsInvoiceUserData
Set InvoiceUserData = New clsInvoiceUserData
If UserForm1.getData6(InvoiceUserData) Then
processUserData4 InvoiceUserData
End If
End Sub
A common requirement in designing a userform meant for use in the Excel environment is getting a reference to a worksheet range from the user. This happens in many instances both to access information that might be in a worksheet as well to write program results into an appropriate worksheet range. For the first the developer must know which cells contain the information. For the second, the developer would want the user to indicate where the program output should go. Given that in the Excel environment this would appear to be a common requirement, one might be tempted to conclude that there is a control for this task. And, one would be right. It is called the RefEdit control. Unfortunately, in older versions of Excel it is not in the default userform design palette though it is in Excel 2003 and Excel 2007. But, more significantly, there are any number of restrictions that render it of limited value. Nonetheless, it is a powerful control worth using when appropriate. The rest of this section is organized as follows. The next sub-section introduces the RefEdit control and illustrates its use. Next follows a discussion on its limitations. The final sub-section provides a workaround that works with a userform shown “modeless.”
In the Visual Basic Editor (VBE), select a userform (add one if necessary). The VBE displays the Toolbox control box on which are a variety of controls including the RefEdit, which is circled in Figure 1.
![]()
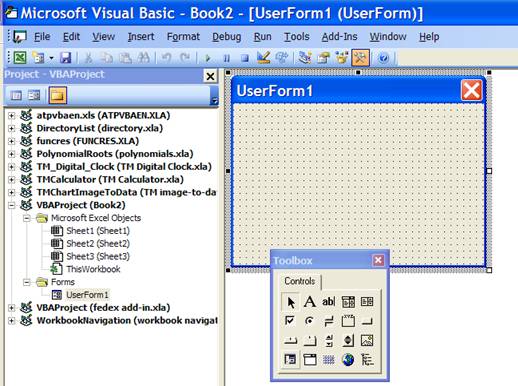
Figure 1
|
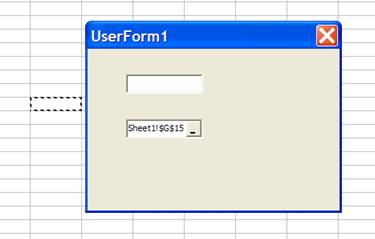
Add both a Textbox and a RefEdit control to the userform. |
|
|
Next, display the userform (press F5). Click in the textbox and try and select a range in the worksheet. Excel will beep and not allow you to do so. Next, click in the RefEdit control and Excel will let you select a range. Its address will show up in the RefEdit control. |
|
This range can be from any worksheet in the active workbook. It used to be that one could select a range from any workbook but somewhere along the lines (Excel 2000 maybe?) Microsoft disabled that capability.
Programmatically, the RefEdit control has a Text property that provides the contents of the RefEdit as a string. So, one can convert the content to a range reference with something like Range(Me.RefEdit1.Text).
The RefEdit is useful in getting information from the user as in the Plot Manager add-in. There are 6 RefEdit controls for the various parameters needed to plot a graph. In each of the controls, the user can enter either a cell reference or a number. The code checks if the RefEdit’s Text property is a number. If so, it uses that number. If not, it checks if this is a valid cell reference and if so, whether that cell contains a number. If so, it uses that number. What would that code look like? The 2 RefEdit controls dealing with the minimum and maximum X values are named XMinVal and XMaxVal. There values go into variables named XMin and XMax respectively. Rather than write code to validate each control, first, we create a generic function that validates any RefEdit control. This function will return a True value if it found a valid value, in which case it would also return that value.
Function getNumberFromRefEdit(aRE As RefEdit.RefEdit, _
ByRef aNumber As Double) As Boolean
If aRE.Text = "" Then
MsgBox "Please enter a value"
aRE.SetFocus
ElseIf IsNumeric(aRE.Text) Then
getNumberFromRefEdit = True
aNumber = CDbl(aRE.Text)
Else
Dim aRng As Range
On Error Resume Next
Set aRng = Range(aRE.Text)
If aRng Is Nothing Then
MsgBox "Please enter a number or a valid reference to a single cell"
aRE.SetFocus
ElseIf aRng.Cells.Count > 1 Then
MsgBox "Please enter a number or a valid reference to a single cell"
aRE.SetFocus
ElseIf IsNumeric(aRng.Value) Then
getNumberFromRefEdit = True
aNumber = CDbl(aRng.Value)
Else
MsgBox "Please enter a number or a valid reference to a single cell"
aRE.SetFocus
End If
End If
End Function
The code to get the XMin and the XMax values is below. Of course, this code is for demonstration purposes and in the actual add-in there is a bit more to it.
Dim XMin As Double, XMax As Double
If Not getNumberFromRefEdit(Me.xMinVal, XMin) Then
Beep
Exit Sub
End If
If Not getNumberFromRefEdit(Me.xMaxVal, XMax) Then
Beep
Exit Sub
End If
In conclusion, the RefEdit is a very useful and very powerful capability when used as it was apparently originally designed.
Remember to put it directly in a userform – do not embed it in some other control such as but not restricted to a Frame or a TabStrip, and make sure the userform is shown modal. If you violate either of the restrictions, you run the risk of having to restart Excel the hard way.
The RefEdit control works as intended when placed directly on a userform. However, place it inside another control – any control including but not limited to a Frame, a MultiPage, or a TabStrip control – and you invite disaster. You’ll be lucky if you can close the dialog box without forcefully shutting down Excel.
Similarly, do not use the RefEdit control in a userform that is shown modeless. Once again, you will be lucky if you avoid a program crash.
If you do decide to experiment with the RefEdit in any of these scenarios, please save your work before displaying the userform since chances are you will be forced to shut down Excel from the Windows Task Manager.
One way to simulate the behavior of the RefEdit control is to use the Worksheet object’s SelectionChange event to identify the user’s range selection and show the address of that selection in a userform textbox. The rest of this sub-section fleshes out the implementation so that we have a solution that we can “drop” into any userform.
Start by creating a new class module. Name it clsModelessRefEdit. To use the SelectionChange event procedure we add a ‘WithEvents’ Application object.
Option Explicit
Dim WithEvents App As Excel.Application
Since the class module will work with any userform, there must be some way to indicate which userform and which controls in that userform we are interested in. We use a Property to indicate the userform of interest. In addition, we will use a Collection object to store the list of controls in which we want a range address and use a method to add individual controls.
Dim myUF As MSForms.UserForm
Dim RefEditBoxes As Collection
Property Set UF(uUF As MSForms.UserForm)
Set myUF = uUF
If Not myUF Is Nothing Then
Set App = Excel.Application
Set RefEditBoxes = New Collection
Else
Set App = Nothing
Set RefEditBoxes = Nothing
End If
End Property
Property Get UF() As MSForms.UserForm
Set UF = myUF
End Property
Public Sub addRefEditBox(uCtrl As MSForms.Control)
On Error Resume Next
RefEditBoxes.Add uCtrl, uCtrl.Name
End Sub
Finally, we add the SelectionChange event procedure. If it finds a valid range reference and if the ActiveControl of the userform is one of the controls in our collection, we update the control’s Text property and execute a bit of a song-and-dance to select the text we just added.
Private Sub App_SheetSelectionChange(ByVal Sh As Object, ByVal Target As Range)
If UF Is Nothing Then GoTo XIT
Dim aCtrl As MSForms.Control
On Error Resume Next
Set aCtrl = RefEditBoxes.Item(UF.ActiveControl.Name)
On Error GoTo 0
If aCtrl Is Nothing Then GoTo XIT
With aCtrl
.Text = Target.Address(External:=True)
'Need the code below to ensure selection of the text in the control
.Enabled = False: .Enabled = True
.SetFocus
.SelStart = 0: .SelLength = Len(.Text)
End With
XIT:
End Sub
This completes our class module that is ready to drop into any add-in. The rest of this sub-section illustrates how to use the above class. Create a userform with three textboxes, TextBox1, TextBox2, TextBox3 and one commandbutton named CommandButton1. Name the userform demoModelessRefEdit and change its caption to Demo Modeless RefEdit
In the userform code module, declare the variable of type clsModelessRefEdit with:
Option Explicit
Dim ModelessRefEdit As clsModelessRefEdit
Instantiate the object in the userform’s Initialize procedure and indicate which of the textboxes are to contain a range reference. In the example, we exclude the last textbox.
Private Sub UserForm_Initialize()
Set ModelessRefEdit = New clsModelessRefEdit
With ModelessRefEdit
Set .UF = Me
.addRefEditBox Me.TextBox1
.addRefEditBox Me.TextBox2
End With
End Sub
The code to use the information in the textboxes is below. The commandbutton’s Click event procedure uses the function RngAddr to display the addresses of the ranges specified in the 2 textboxes.
Private Sub CommandButton1_Click()
MsgBox RngAddr(Me.TextBox1) & vbNewLine & RngAddr(Me.TextBox2)
End Sub
Function RngAddr(aCtrl As MSForms.Control) As String
On Error Resume Next
If aCtrl.Text = "" Then
RngAddr = "Control is empty"
Else
RngAddr = Range(aCtrl.Text).Address(External:=True)
RngAddr = IIf(RngAddr = "", Err.Description, RngAddr)
End If
End Function
Finally, to show the userform modeless, add the code below in a standard module.
Sub testModelessRefEdit()
demoModelessRefEdit.Show vbModeless
End Sub
Click in any of the userform’s 1st two textboxes and then select a worksheet range. The address will be shown in the textbox. Do the same with the 3rd textbox and nothing will happen. Or design works as intended since the last textbox was not included in the list of controls provided to the class module.

In this chapter, we addressed two important and often overlooked elements of userform code design. First, we developed a modular code architecture that supported the clean separation of userform code from the other code in the add-in particularly the business logic code. The highly modular architecture we developed supported userforms shown modal or modeless. In the process of going from the default approach encouraged by Microsoft to the highly modular final result we also learnt how to approach the task of designing modular code.
Second, we looked at how the developer can get, in a userform control, a reference to an Excel range. The default RefEdit control works very well as long as it is neither embedded in another control nor included in a userform that is shown modeless. We also saw how to simulate the RefEdit control in the context of a userform shown modeless.
[1] The idea of using the worksheet SelectionChange event came from a discussion some years ago. It might have been a discussion with one or more fellow Microsoft MVPs at one of the MVP summits; or, it might have been in some Internet-based forum; or it might have been a discussion with a MVP I met on one of my many business trips. In any case, it is only fair that I don’t take all the credit for the idea. I will, however, take all the credit – and responsibility for any errors – with the implementation.